美味しいごはん、何で炊く?
Written by Masa
For a long time, I thought cooking rice meant using a rice cooker.
That was simply how we did it at home in Japan. Wash the rice, add water up to the line inside the rice cooker, let it soak, press the button, wait, and then fluff the rice with a rice paddle.
I didn’t think much about any of this.
Then, during my first homestay overseas, I watched my host put rice in a heat-proof glass bowl, cover it, and cook it in the microwave.
My reaction was basically, “Noooo!”
Despite my initial reaction, the rice was perfectly edible. I wouldn’t say it had the fluffy texture I was used to, but there was nothing really wrong with it.
Funnily enough, I don’t even own a rice cooker now. When my old—and very good—one broke, I started cooking rice in a saucepan instead. It cooked rice just fine, and for the amount we usually make, it was faster than my rice cooker had been. It also didn’t take up any extra space on the kitchen counter.
So if you are wondering whether you need a Japanese rice cooker to cook Japanese-style rice, it’s certainly worth considering, but it may not be necessary.
Here are five types of equipment worth considering.

Jump to the Equipment You Want
Option 1: A Saucepan — My Current Method
This is now my normal method.
We are a two-person household, and I usually cook two go of rice at a time. One Japanese rice cup, or go, is about 3/4 of a US cup (180 ml) by volume and roughly 150 g of uncooked rice, so two go is around 300 g.
I cook rice about four times a week. We have some with dinner, then use the rest the following day or freeze it.
For that kind of routine, a heavy saucepan with a good lid does the job.
A Basic Saucepan Method
If you have never cooked Japanese-style rice in a pot before, this is a practical starting point:
- Measure the rice accurately.
- Rinse it gently and drain the water.
- Put rice and measured water into the sauce pan and soak for at least 30 minutes.
- Cover the saucepan and bring it to a full boil .
- Reduce the heat and cook over very low heat for about 12 minutes.
- Turn off the heat and leave the lid closed for another 10–15 minutes.
- Gently turn and loosen the rice.
Your exact timing may change with your stove and pot.
My thick saucepan on gas works particularly well. Once the water boils, I turn the heat down low, so it doesn’t require constant attention.
I do use a timer.
I also occasionally forget to start the timer.
Somehow, I have burned the bottom only a few times. A heavy pot and low heat are probably doing some of the work for me there.
Option 2: A Rice Cooker — Convenient and Consistent
I don’t think everyone needs a rice cooker, but I also don’t think rice cookers are pointless just because I no longer use one.
If you eat rice almost every day and want consistent results with very little attention, a rice cooker makes sense.
Measure the rice, rinse it, add water to the appropriate line in the inner pot, choose the setting, and let the machine handle the heating cycle.
With modern rice cookers, check the instructions before automatically adding a separate soaking period. Some models incorporate soaking and steaming into their programmed cooking cycle.
Rice cookers can also offer timers, reheating, and keep-warm functions.
Personally, keeping rice warm for a long time has never been my favorite way to store it. I would rather put leftover rice in the fridge or freezer and reheat it later.
Having said that, rice cookers have changed quite a bit since the one I used. Current Zojirushi models, for example, can include automatic and extended keep-warm modes, reheating, multiple rice settings, steaming, and even a cake setting on some models.
My old rice cooker would have been over 30 years old by now if it were still going, so I probably shouldn’t judge today’s machines entirely by it.
For someone who eats freshly cooked rice every day, has children coming and going at different times, or simply doesn’t want to think about heat settings, a rice cooker may be worth the counter space.
Option 3: An Enameled Cast-Iron Pot Such As Le Creuset
If you already have an enameled cast-iron pot, you might want to try using it for rice. You can start with essentially the same method as the basic saucepan method above.
Heavy enameled cast iron holds heat well, which can make it useful for cooking rice. Le Creuset even makes a cast-iron pot specifically for rice, and its rice pots can be used on gas, electric, and induction cooktops.
I actually own what I would politely call a Le-Creuset-like pot. I wasn’t especially happy with the rice I got from my usual saucepan on induction—I normally use a portable gas stove for cooking rice—so I’ve been curious to see whether the enameled cast-iron pot would do better.
The problem is that my pot is quite large for the two go I normally cook, so I haven’t tested it yet.
That experiment is still waiting.
For a larger household, though, I can see the appeal. Depending on the size of the pot, you could cook three or four go at once, eat what you need, and freeze the rest.
You could also shape some of the extra rice into onigiri (rice balls) before freezing it. For a family with children, having onigiri ready to reheat could be more useful than keeping rice warm for hours.
Option 4: The Microwave
A microwave may not be the first thing that comes to mind when you think about cooking rice, but it can be surprisingly practical.
Years ago, my younger brother and his family had to move into a hotel for about a month after a problem was discovered in their newly built house.
At the time, their children were still in high school and university, and the high schooler needed a packed lunch every day.
They asked the hotel to put a microwave in their room and used a microwave rice cooker to make rice every day.
When I heard about this, I was skeptical.
“Does it actually cook good rice?”
My sister-in-law’s answer was basically, “Actually, it turns out really well.”
That stayed with me.
I had cooked rice in a microwave before too, but under very different conditions: an old microwave, a heatproof glass bowl covered with plastic wrap, and ordinary supermarket rice. So I don’t think my experience is really comparable to theirs.
For someone in a dorm, hotel, temporary accommodation, RV, or small kitchen without a full stove, microwave rice can be a very practical option.
Option 5: An Instant Pot
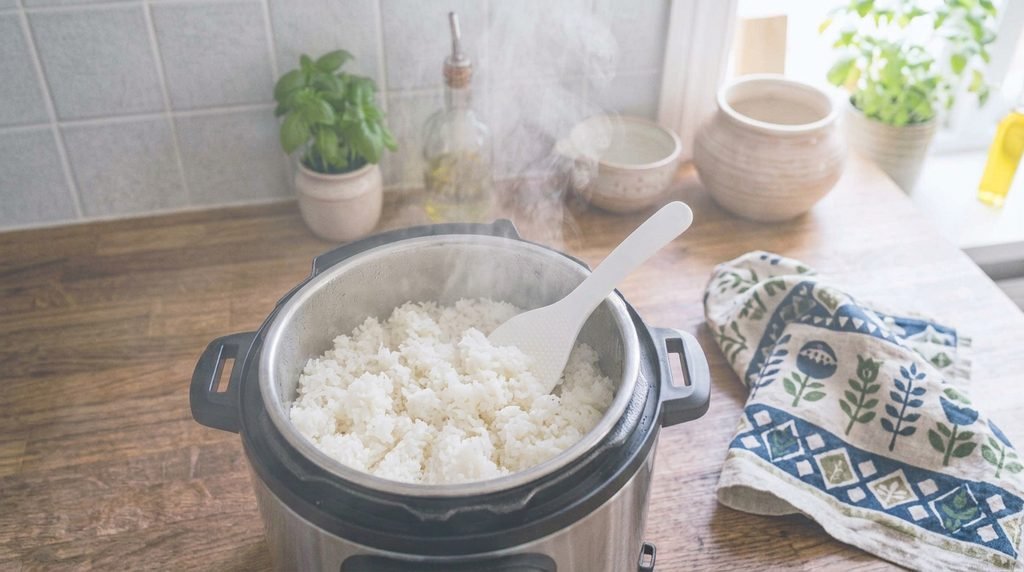
If you already have an Instant Pot, you don’t necessarily need another appliance just to cook rice.
I have one myself, but until recently, I had never managed to cook rice in it that I was completely happy with.
That didn’t mean it couldn’t be done. Plenty of people cook Japanese short-grain rice successfully in an Instant Pot. There are also techniques such as pot-in-pot cooking, where the rice cooks in a separate bowl inside the Instant Pot. That can be useful for smaller portions or when you’re cooking something else at the same time.
So I decided to give it another try.
This time, I followed the method Nami-san of Just One Cookbook uses for Japanese short-grain rice.
The result was… quite amazing!
Actually, it was the best rice I had ever cooked in my Instant Pot. I would happily put it alongside the rice I normally cook in my saucepan.
For my two go (360 ml) of rice, Nami-san’s basic process was:
- Wash the rice and soak it for about 30 minutes.
- Drain it thoroughly, leave it for 10 minutes, then put the rice in the Instant Pot with 360 ml of fresh water.
- Cook on High Pressure for 2 minutes.
- Let the pressure release naturally for 10 minutes (setting a timer is recommended), then release any remaining pressure, open the lid, and fluff the rice.
The 1:1 rice-to-water ratio surprised me because I use considerably more water when I cook the same amount of rice in a saucepan. But very little moisture escapes from the Instant Pot, so it makes sense.
While I was eating it, I did think I might like the rice just a touch softer.
That could have been because I released the pressure after eight minutes rather than the full ten, so I’ll try following that part properly next time before I start changing the water.
Maybe it was because of the resting time, or maybe it was the rice I used. Or maybe next time I’ll add a little more water.
Whatever, the Instant Pot has officially made it back onto my list of perfectly good ways to cook rice.
So Which Method Should You Choose?
I think it comes down to how you actually live.
If you eat rice every day and want consistent results with very little hands-on attention, a rice cooker makes a lot of sense.
If you cook rice a few times a week, especially for only one or two people, a saucepan may be all you need.
If you already own an enameled cast-iron pot, that’s another option worth experimenting with.
A microwave is a surprisingly practical option, especially in a small kitchen, dorm, hotel, or anywhere you don’t have access to a full stove.
And if you already own an Instant Pot, I’d definitely recommend giving it a try—my latest batch certainly changed my mind about that.
The equipment matters, but perhaps less than I once assumed.
And if your first attempt is slightly too hard, too soft, or a little stuck to the bottom, I wouldn’t conclude that you “can’t cook rice.”
Change one thing next time.
I once turned perfectly good Japanese rice into something approaching porridge simply because I trusted the water ratio that worked for the rice I normally cooked overseas.
Rice is simple.
But the rice itself isn’t always the same.
Next Story: Japanese Rice Basics: What I Learned at Home and What I Do Differently Now